Small Apartment Lighting Ideas: How One Host Lost 50% of Bookings (And How to Fix It)
Last week, another Airbnb host rang me desperate for advice.
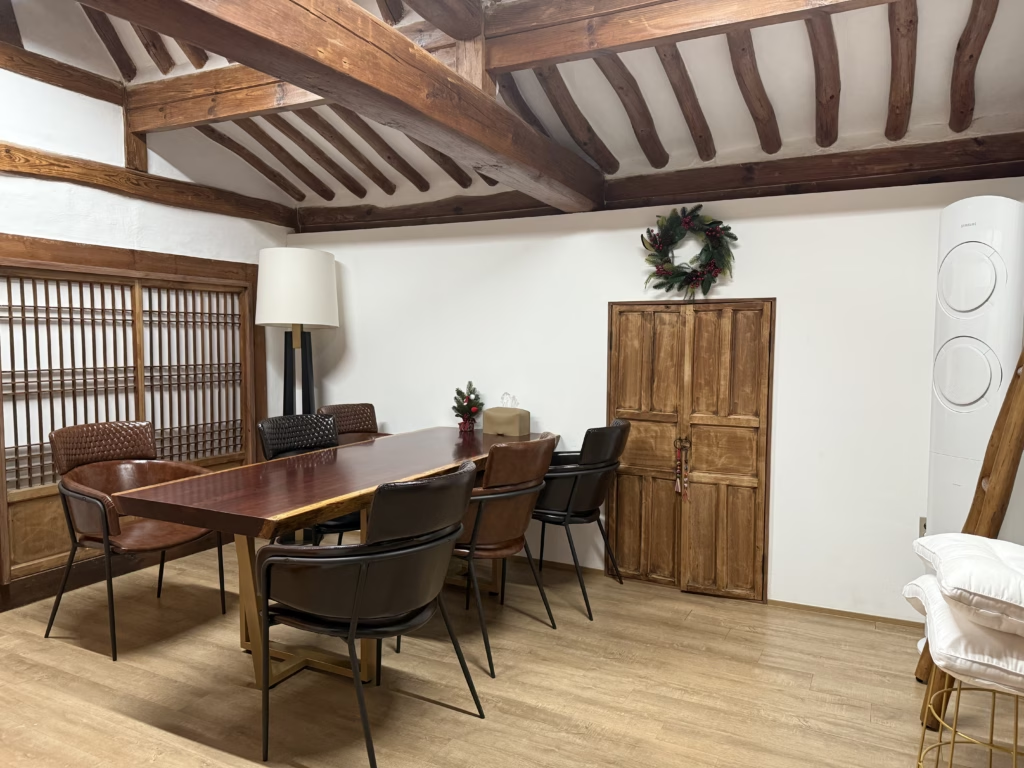
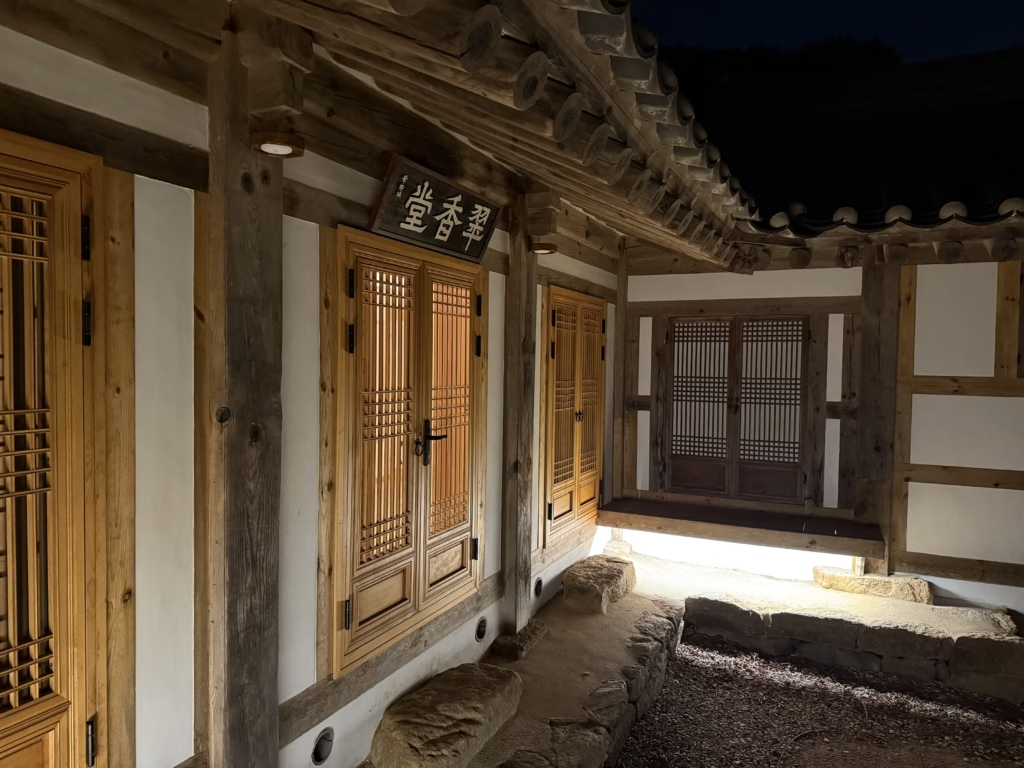
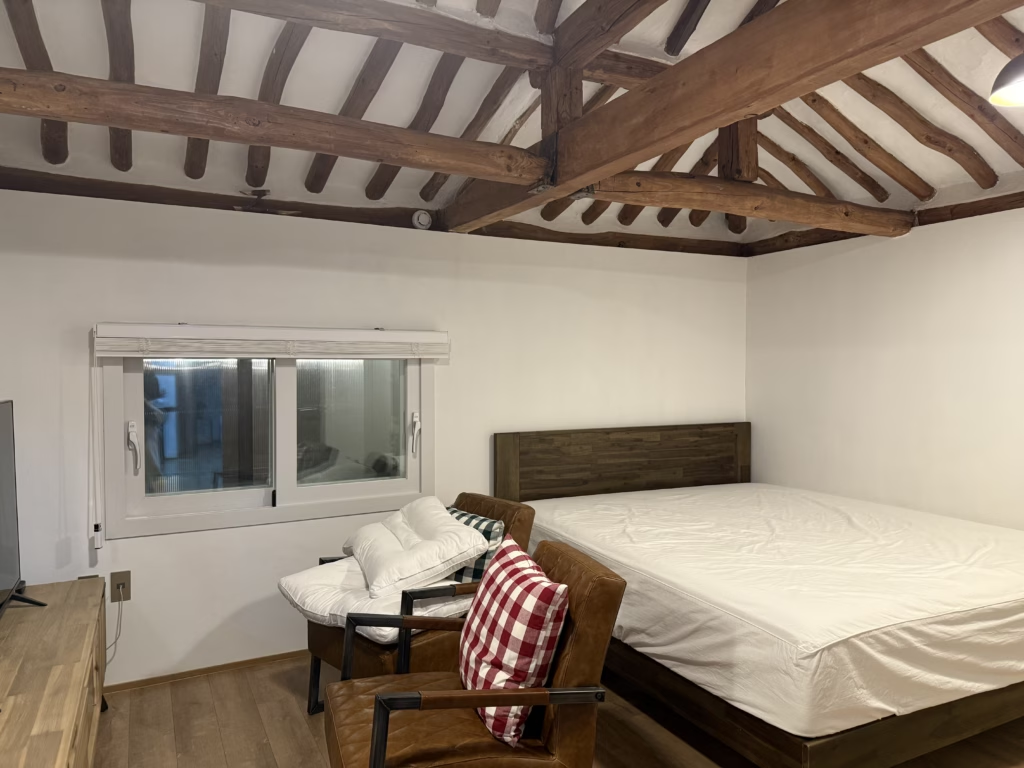
Her property is stunning—traditional Korean hanok with exposed wooden beams, beautiful architectural details, and gorgeous furniture. She hired a professional photographer. She keeps the space spotless.
Yet she’s only booking 12-16 days per month. 50% occupancy in December when other hosts are fully booked.
The strangest part? Guests consistently tell her: “Your accommodation looks SO much better in person than in the photos.”
She asked me to review her photographer’s portfolio. I spotted the problem immediately—but it wasn’t the photographer.
It was the lighting.
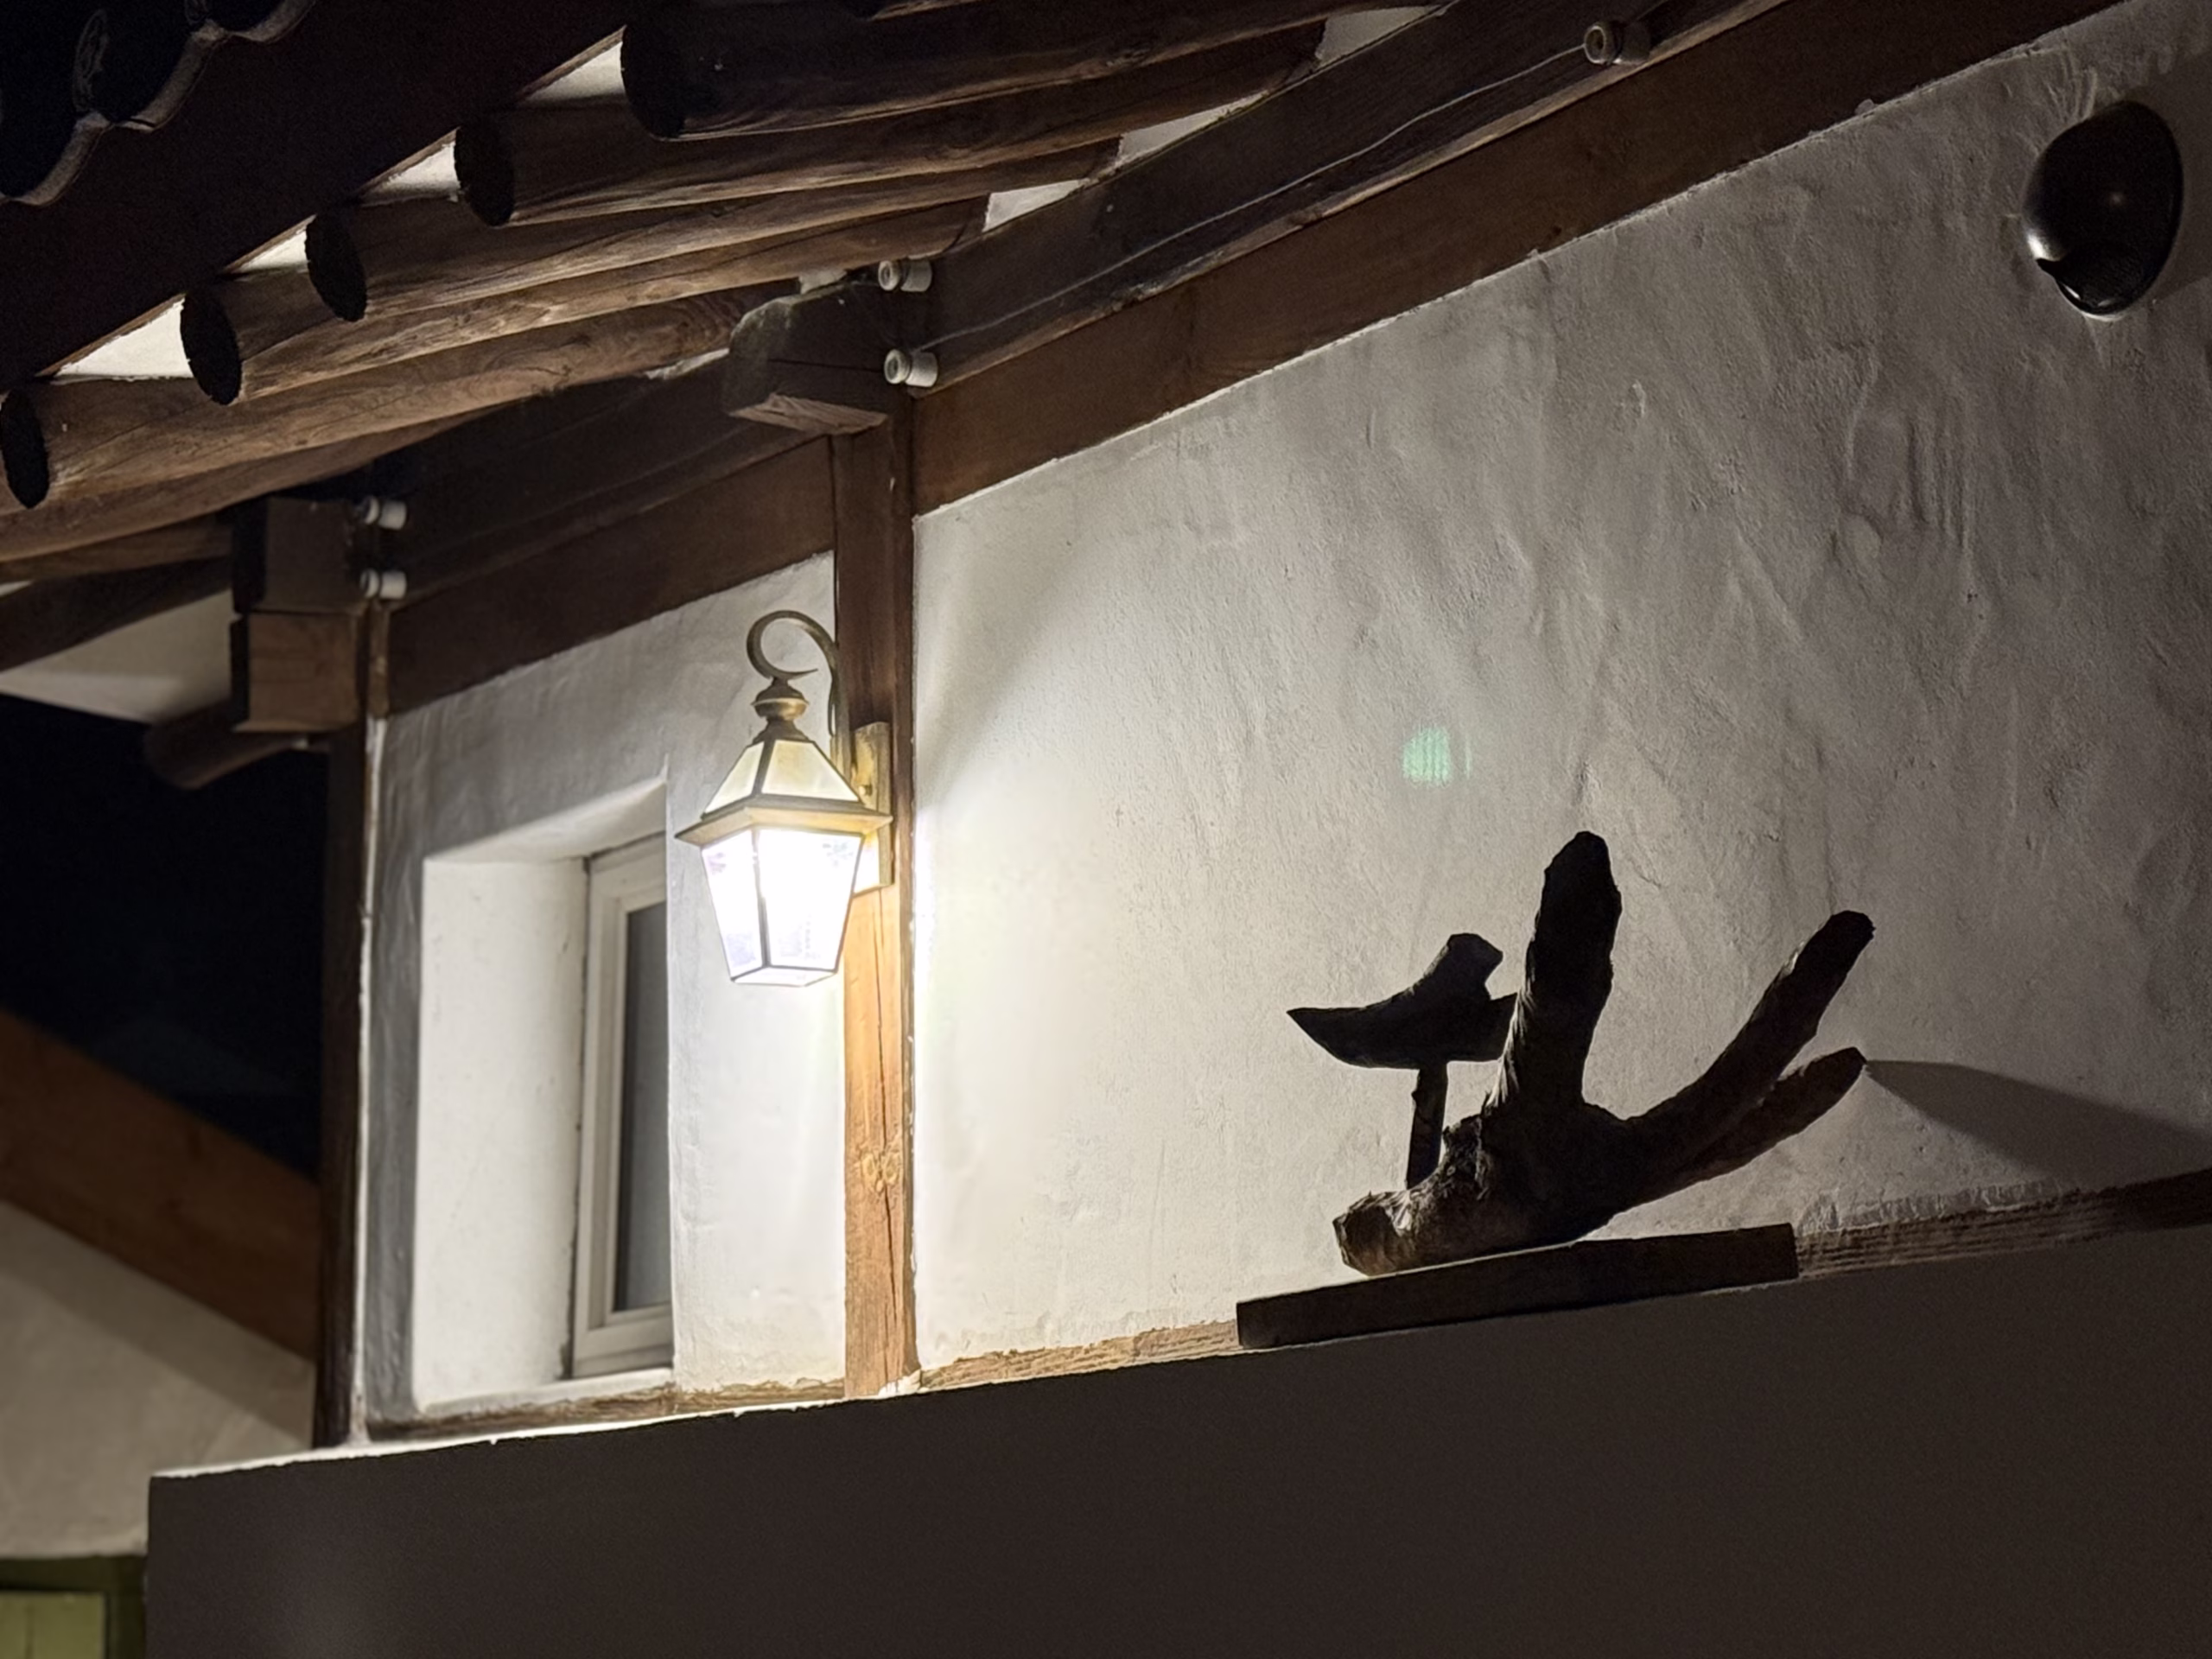
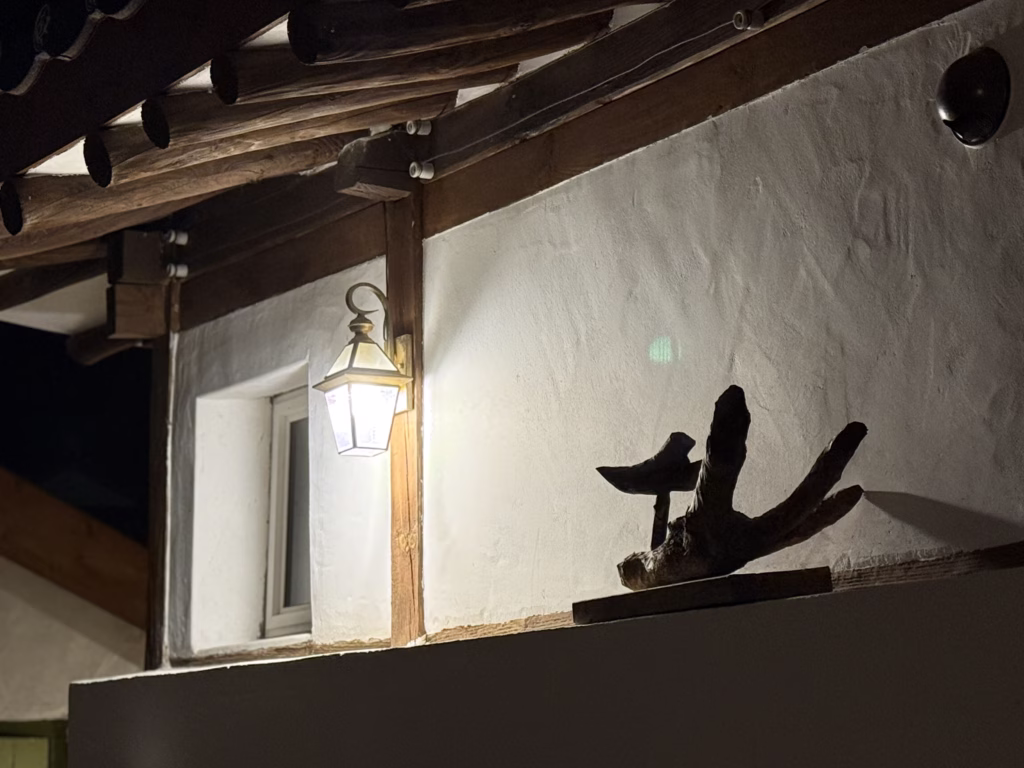
She had installed bright white flash lights in the living room ceiling. Harsh, cold, institutional—completely killing the warm, traditional aesthetic her space naturally had.
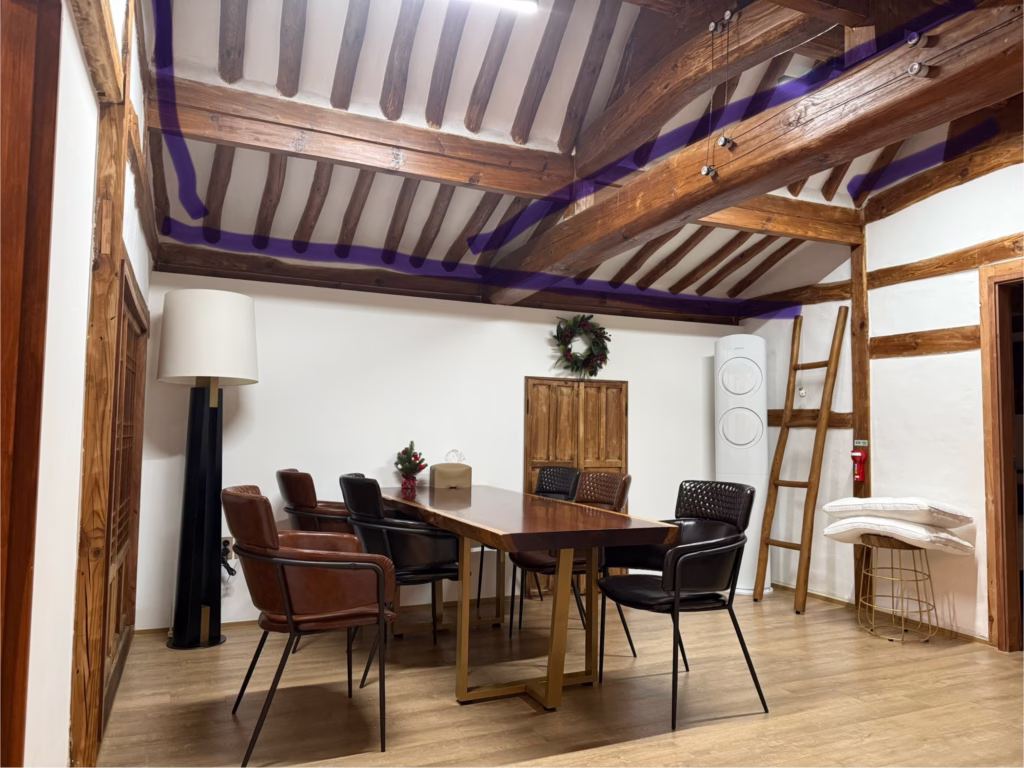
I marked up her photos with purple lines showing exactly where to install warm yellow indirect lighting. I told her to add mood lamps. I explained why her morning daylight photos weren’t working (the property lacks good natural light—afternoon photos with indirect lights work better).
One lighting consultation could increase her bookings from 50% to 80-90%.
After hosting 500+ guests and consulting for other Airbnb hosts, I’ve learnt that lighting isn’t just about visibility—it’s about perception, value, and bookings.
I’m a former Airbnb Superhost who maintained 90%+ occupancy across multiple properties. Here’s what actually works when lighting small flats—and the expensive mistakes that keep beautiful properties empty.
The Real Problem: Beautiful Space, Terrible Lighting
Let me show you exactly what I saw in her property.
What She Had:
Traditional Korean hanok features:
- Exposed wooden ceiling beams (gorgeous architecture)
- White walls (perfect backdrop)
- Beautiful wooden furniture
- High ceilings with character
Her lighting setup:
- Bright white flash lights installed in ceiling
- Even, flat illumination
- No mood or atmosphere
- Photos looked cold and institutional
The result:
- 50% occupancy (12-16 days/month)
- Photos that didn’t capture the space’s beauty
- Guests saying “it’s better in person” (meaning photos undersell it)
- Lost revenue: roughly 15 nights × $200-250/night = $3,000-3,750 lost monthly
What I Told Her to Do:
1. Install warm yellow indirect lighting on ceiling beams (marked with purple lines in photos)
- Highlights architectural details
- Creates warm glow without harsh shadows
- Makes wooden beams look rich and inviting
- Cost: $200-400 for LED strips + installation
2. Add mood lamps in living room
- Positioned strategically near seating
- Warm 2700K bulbs
- Creates layered lighting depth
- Cost: $80-150 for 2-3 quality lamps
3. Change photography approach
- Stop shooting in morning daylight (property has poor natural light)
- Shoot in afternoon with ONLY indirect lights on
- Warm lamp glow creates cosy atmosphere
- Makes space look inviting, not clinical
Estimated cost to fix: $300-550
Estimated monthly revenue increase: $1,500-2,250
ROI: 273-750% in first month alone
Why Lighting Matters More Than Photography
Here’s what most hosts don’t understand:
You can hire the best photographer in the world, but if your lighting is wrong, the photos will never sell your space.
The Host’s Question:
“Should I take photos in daylight or at night?”
My Answer:
It depends on your natural light situation.
If you have GOOD natural light:
- Morning/golden hour photos show space clearly
- Bright, airy, spacious feel
- Daylight is your asset
If you have POOR natural light (like her property):
- Daylight photos look dim and grey
- Space feels dark and uninviting
- Afternoon with warm artificial lighting works better
- Creates atmosphere that daylight can’t provide
Her mistake: Assuming daylight automatically makes better photos. It doesn’t—if you don’t have enough of it.
The Three Types of Lighting (And Why She Only Had One)
Professional designers use 3-layer lighting. She had zero layers.
Layer 1: Ambient Lighting (General Illumination)
What she had: Bright white ceiling flash lights (harsh, flat, institutional)
What she needs: Warm indirect lighting on ceiling beams
- Highlights architecture
- Bounces light off surfaces
- Creates depth and warmth
- No harsh shadows
Cost: $200-400 LED strips + installation
Layer 2: Task Lighting (Functional Areas)
What she had: Nothing—only overhead
What she needs:
- Reading lamps near seating
- Desk lamp if workspace area
- Kitchen task lighting for prep areas
Cost: $60-100 for quality task lamps
Layer 3: Accent/Mood Lighting (Character & Atmosphere)
What she had: Zero mood lighting
What she needs:
- Statement floor lamp in living room
- Table lamps on surfaces
- Warm 2700K bulbs everywhere
- Creates cosy atmosphere guests remember
Cost: $80-150 for 2-3 mood lamps
My Lighting Philosophy: Indirect Lighting for Traditional Architecture
After seeing her beautiful hanok property ruined by harsh overhead lighting, here’s what I believe:
Traditional architecture DEMANDS indirect lighting.
Why? Because:
- Exposed beams need highlighting – Direct overhead flattens them; indirect uplighting makes them glow
- Wood looks warmer with warm light – Cold white makes wood look grey and cheap
- High ceilings need depth – Flat overhead creates one-dimensional space; layered lighting creates drama
- Traditional aesthetics conflict with modern flash lighting – Hanok was designed for candlelight, lanterns, indirect glow
The psychology:
Guests booking traditional hanok want:
- Warm, cosy atmosphere
- Cultural experience
- Romantic/special ambiance
Bright white flash lighting says:
- Office building
- Hospital
- Cheap renovation
- No attention to detail
One creates 90% occupancy. One creates 50% occupancy.
Colour Temperature: The Mistake That Kills Traditional Spaces
Her white flash lights were probably 4000K-5000K (cool white).
This is WRONG for traditional architecture.
Understanding Kelvin:
2700K (Warm White/Soft White):
- Yellowish warm glow
- Like sunset, candlelight, traditional lanterns
- ESSENTIAL for traditional spaces
- Makes wood look rich and inviting
3000K (Warm White):
- Slightly crisper than 2700K
- Acceptable for modern kitchens/bathrooms
- Still warm enough for most spaces
4000K-5000K (Cool White) – What She Had:
- Blue-toned, clinical, institutional
- Makes wood look grey
- Creates cold, unwelcoming atmosphere
- NEVER use in traditional or residential spaces
Cost to fix: Same bulbs, same installation, just buy 2700K instead of 5000K.
Zero cost difference. Massive occupancy difference.
When Professional Photography Can’t Save Bad Lighting
She hired a professional photographer. The photos were technically good—sharp, well-composed, properly exposed.
But they didn’t sell bookings.
Why? Because:
- You can’t photograph warmth that doesn’t exist – Her space had harsh overhead lighting creating cold atmosphere; photographer captured accurate reality
- Professional editing can’t fix bad ambient light – Photoshop can’t add cosiness that wasn’t there during shoot
- Guests recognise authentic atmosphere – They see warm lighting in other listings and choose those
The photographer wasn’t the problem. The lighting was.
Guest Feedback as Diagnostic Tool
“Your accommodation looks SO much better in person than the photos.”
This sentence tells you EVERYTHING.
Translation:
- ✅ Your space IS beautiful
- ✅ Your hosting IS good
- ❌ Your photos DON’T capture it
- ❌ Your lighting KILLS the photos
If guests consistently say your place is better in person, you have a lighting/photography problem—not a hosting problem.
The Photography Timing Strategy
Another question she asked: “Should I shoot in daylight or at night?”
My Framework:
Test your natural light first:
Walk through property at different times:
- Morning (8-10am)
- Midday (12-2pm)
- Afternoon (3-5pm)
- Evening (6-8pm)
If natural light makes space look bright and airy: Shoot morning/golden hour
If natural light makes space look dim and grey: Shoot afternoon with warm artificial lighting on
Her property: Poor natural light → Afternoon with indirect lights on works better
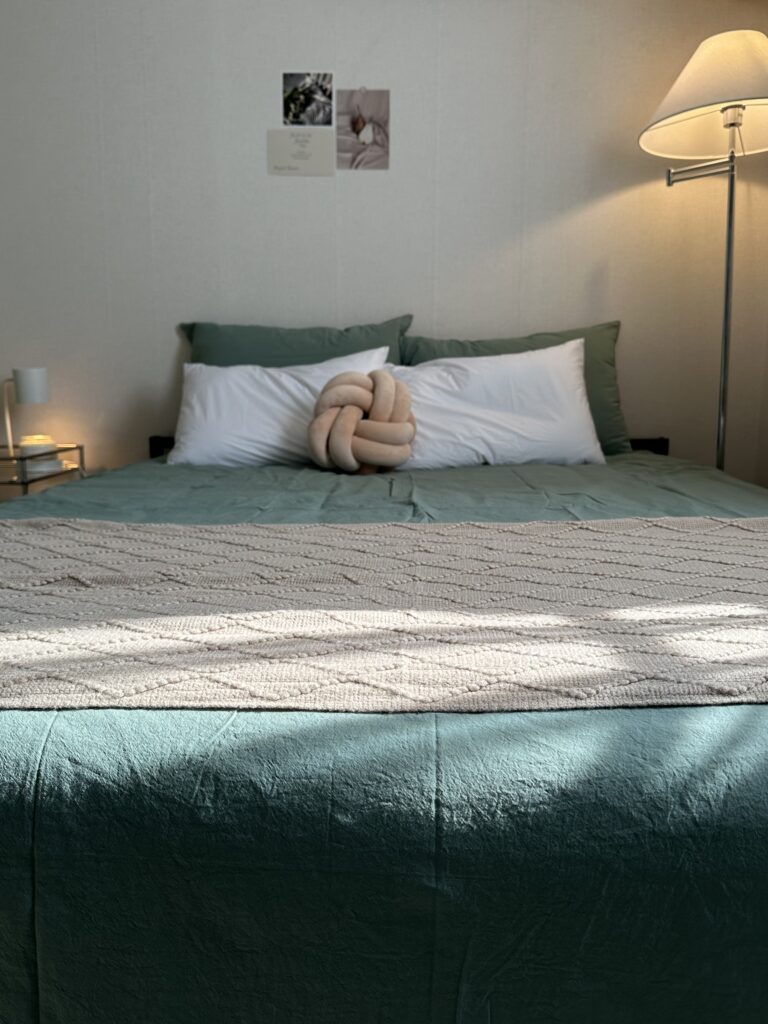
My properties: Property #2 had excellent natural light (sheer curtains), shot morning + evening with lamps on for variety. Properties #1, #3, #4 had poor natural light, shot afternoon with all lamps glowing.
My Properties: What Actually Works
After 500+ guests and 90%+ occupancy across multiple properties:
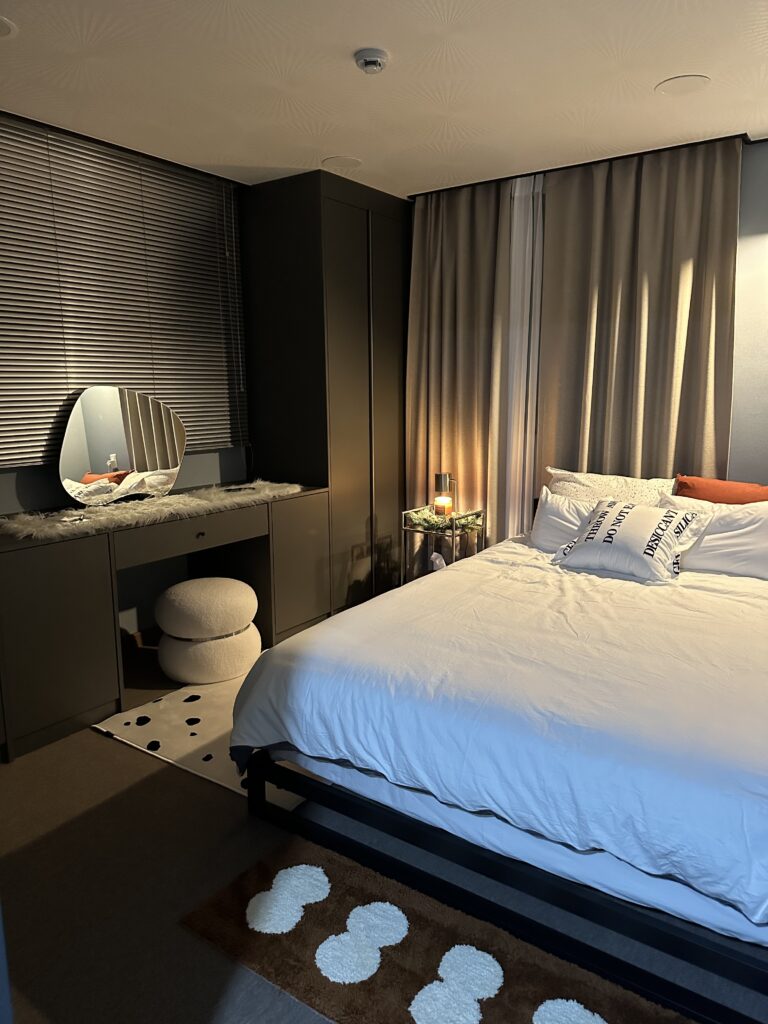
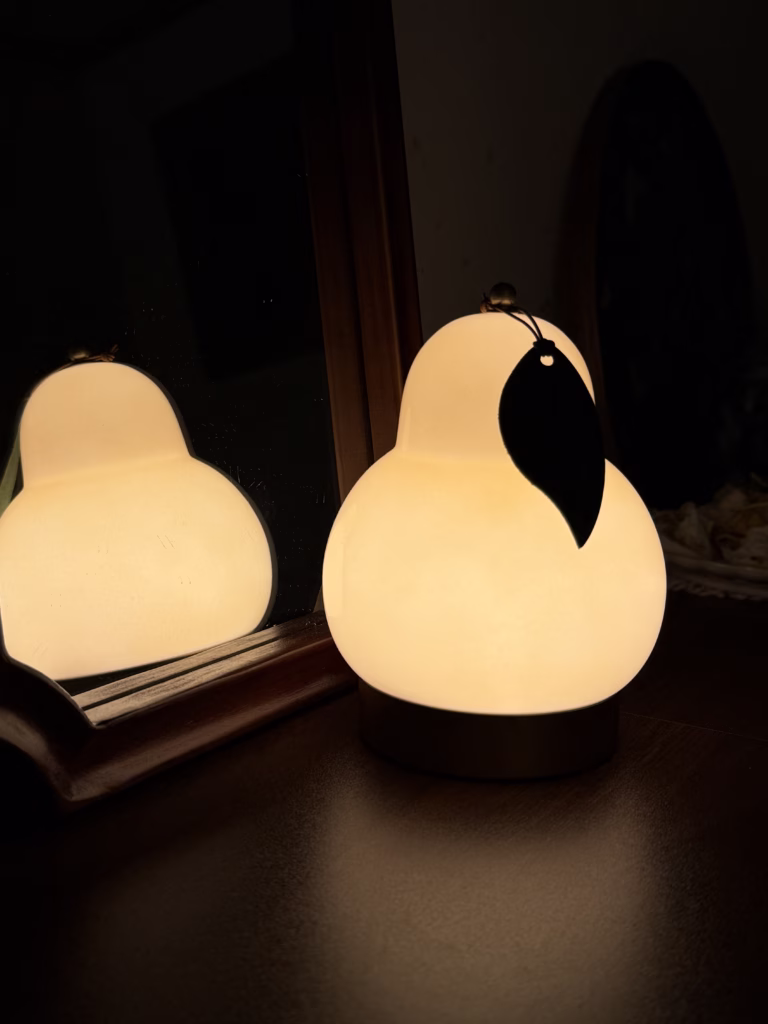
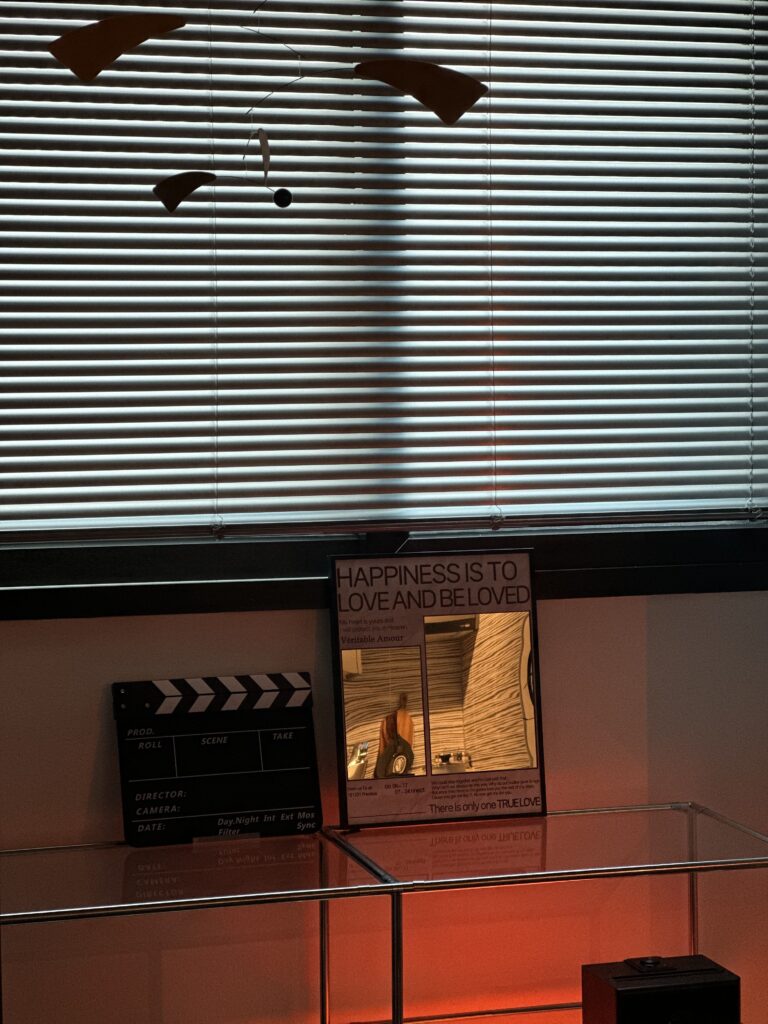
Property #3 – Iconic Orange Lamps:
- Statement lamps as focal points
- Warm indirect lighting
- Smart-controlled (turned on before guests arrive)
- Guest mentions: “Loved the lamps,” “unique lighting”
- One guest bought my lamp after seeing it in photos/person
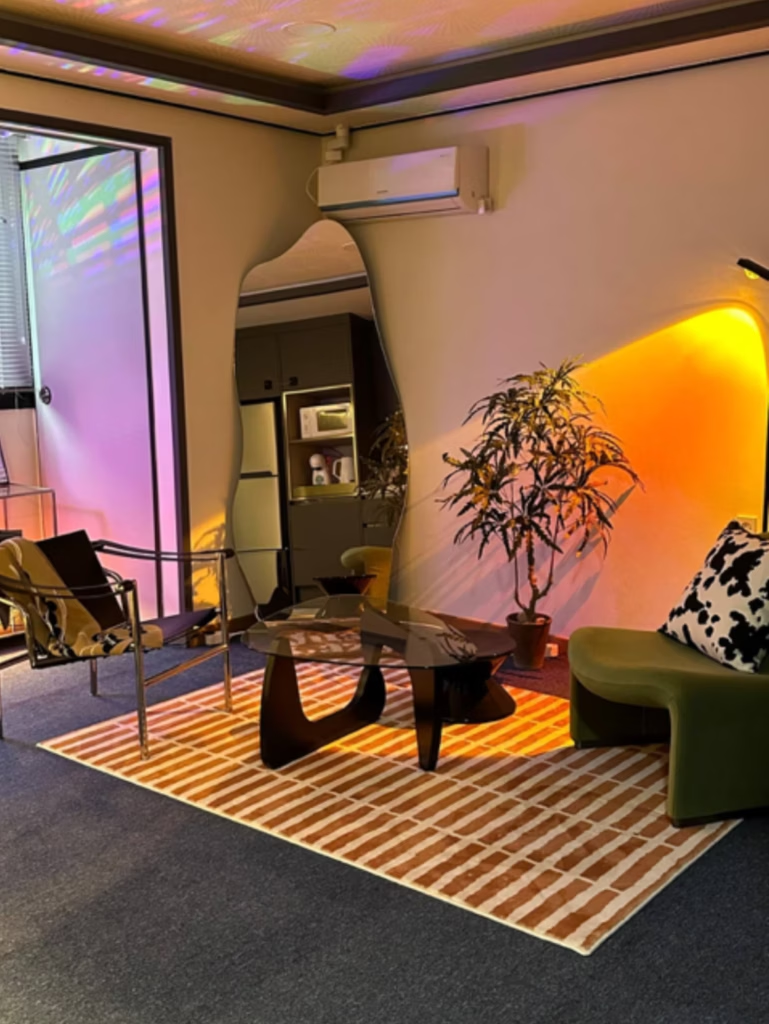
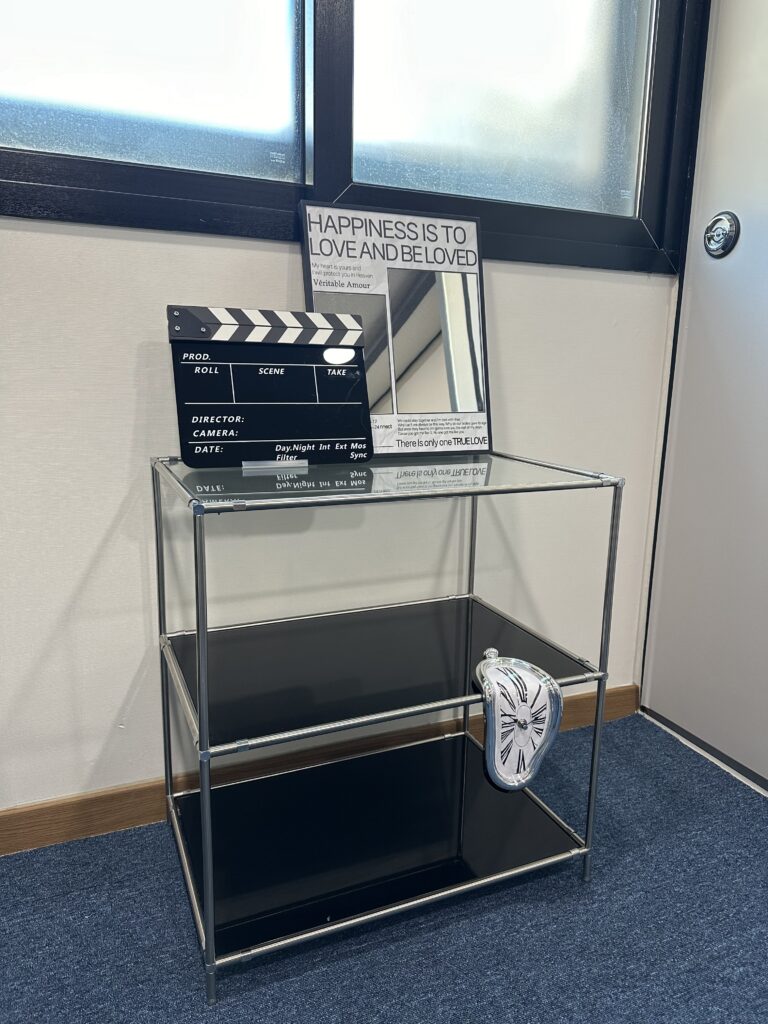
See? Even my carefully designed property looks completely different with direct lighting.
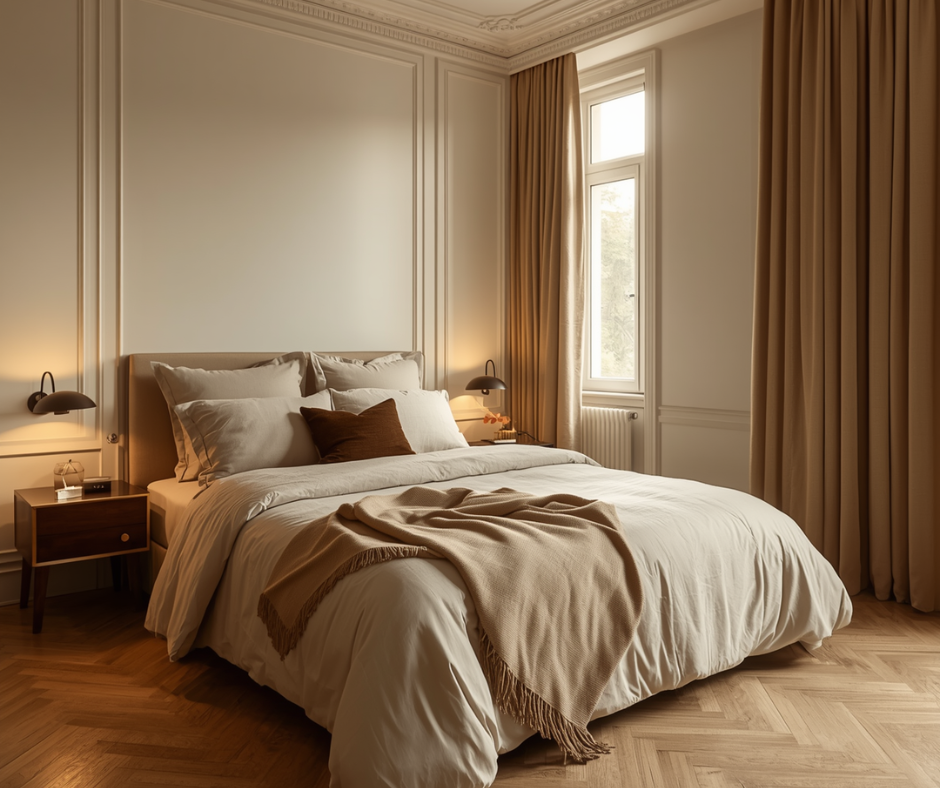
Property #2 – Best Natural + Artificial:
- Excellent natural light (sheer + blackout curtains)
- Warm 2700K bulbs in all fixtures
- Multiple dimmable layers
- 94% occupancy
- Guest mentions: “Perfect lighting for reading,” “cosy atmosphere”
Common thread:
- Warm white (2700K) everywhere
- Multiple light sources (3-5 per room)
- Indirect + accent lighting (not just overhead)
- Photographs beautifully = drives bookings
The Budget Fix: $300-550 Complete Transformation
For the hanok host, here’s the exact investment needed:
Priority 1: Indirect Ceiling Lighting ($200-400)
- Warm yellow LED strips along ceiling beams
- Highlights architecture
- Creates ambient glow
- Biggest visual impact
Priority 2: Mood Lamps ($80-150)
- 2-3 quality floor/table lamps
- Warm 2700K bulbs
- Positioned near seating areas
- Adds layered depth
Optional: Smart Controls ($50-80)
- Control indirect lighting remotely
- Turn on before guests arrive
- Perfect arrival ambiance
Total: $330-630
Expected monthly revenue increase from better photos/bookings: $1,500-2,250
Payback period: 10-14 days
Common Lighting Mistakes in Beautiful Properties
Mistake #1: Assuming expensive property = good lighting
- Beautiful space with harsh lighting = poor bookings
- Average space with warm lighting = high bookings
Mistake #2: Thinking professional photographer solves everything
- Photographer captures reality
- If reality is harsh lighting, photos show harsh lighting
- Fix lighting BEFORE hiring photographer
Mistake #3: Using “bright = better” logic
- Bright white flash lights seem more visible
- But warm indirect lighting creates atmosphere
- Atmosphere drives bookings
Mistake #4: Wrong photography timing
- Shooting in daylight when you have poor natural light
- Makes space look dim and grey
- Shoot with warm artificial lighting instead
Mistake #5: Treating lighting as decoration, not investment
- $300-550 lighting fix = $1,500-2,250 monthly revenue
- ROI: 273-750% first month
- Continues paying back every month forever

Conclusion: Lighting Is the Difference Between 50% and 90% Occupancy
The hanok host’s story isn’t unique. I see this constantly:
Beautiful properties with terrible lighting = empty calendars
Average properties with great lighting = fully booked
Lighting affects:
- First impression when scrolling listings
- Guest perception of value
- Photography quality
- Review mentions
- Rebooking decisions
Her current situation:
- 50% occupancy (12-16 days/month)
- Guests love the space in person
- Photos don’t capture the beauty
- Professional photographer couldn’t fix fundamental lighting problem
Her potential after lighting fix:
- 80-90% occupancy (24-27 days/month)
- Photos that capture the warm traditional atmosphere
- Higher nightly rates (warm aesthetic = premium pricing)
- Guest reviews mentioning “beautiful lighting,” “cosy atmosphere”
- Revenue increase: $1,500-2,250/month from $300-550 investment
If your guests say “it’s better in person than photos,” you don’t have a photography problem. You have a lighting problem.
Fix the lighting. Take new photos. Watch your bookings increase.